How to Draw a Realistic Rose
Learn to sketch a beautiful rose step-by-step, mastering shapes, shading, and details that bring your drawing to life.
How to Draw a Realistic Rose
In this tutorial, you will learn how to draw a realistic rose, progressing from simple shapes to a detailed final sketch. This artwork will help you develop your skills in shading, line work, and understanding floral forms. Whether you are a beginner or looking to improve your drawing techniques, this guide will lead you through the process step-by-step.
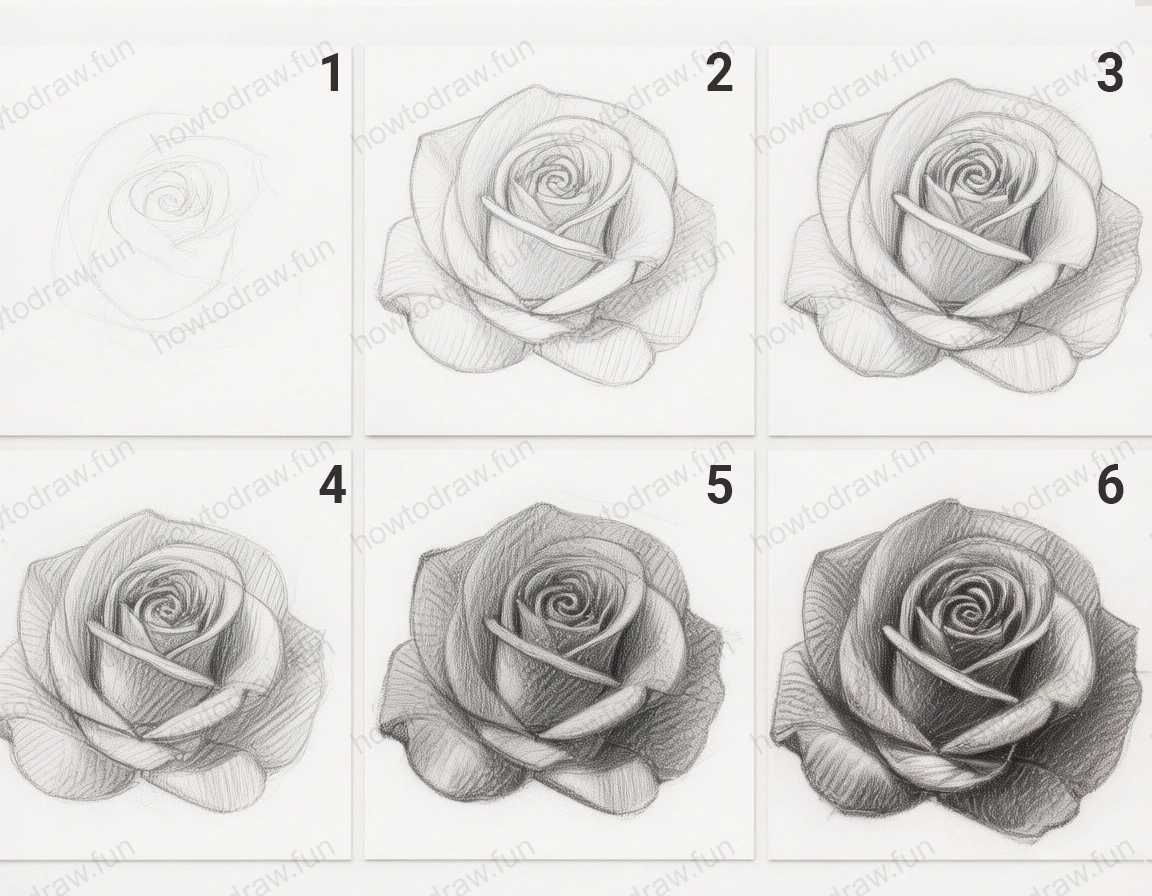
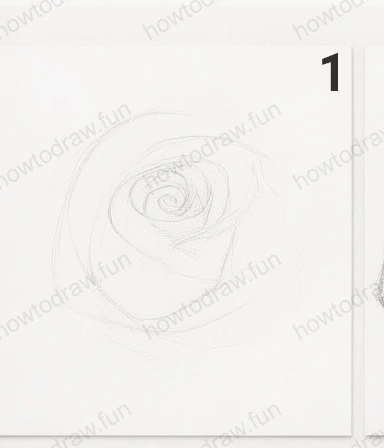
Step 1:
Start by sketching the basic shape of the rose. Use light pencil strokes to draw a loose circle for the bloom, and then add a smaller spiral shape in the center to represent the inner petals. Keep your lines gentle, allowing for adjustments later. Position the circle slightly off-center to create a more natural look. Make sure to leave enough space around the shape for the outer petals that will be added in later steps. This step is crucial as it lays the groundwork for the rest of your drawing; avoid pressing too hard with your pencil to keep your sketch easy to erase if needed.
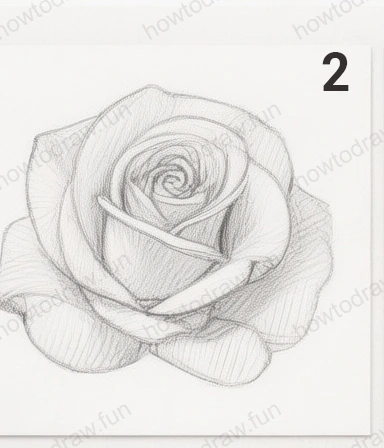
Step 2:
Build on the initial shape by adding the petals around the bloom. Begin with the outer petals, drawing large, flowing curves that wrap around the circle. Pay attention to how the petals overlap, as this adds dimension to your drawing. Use varying line thickness to represent the depth of the petals; thicker lines can indicate shadows while lighter lines can suggest highlights. Remember to adjust the size and shape of each petal to create a more realistic appearance, aiming for a natural flow. Don’t be afraid to erase and refine your lines as you go.
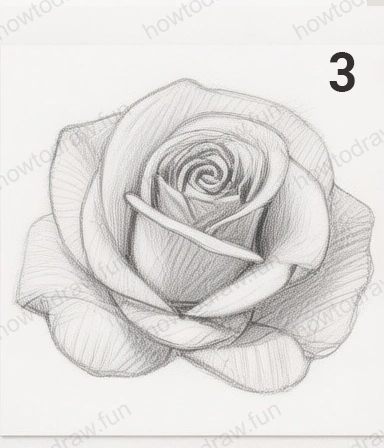
Step 3:
Now, focus on refining the petal details. Add fine lines within each petal to depict texture and depth, using short strokes to suggest the petal’s curve. This is the perfect moment to start thinking about shading; use a light hand to add shadows along the edges of the petals where they overlap. Make sure to maintain the overall shape of the rose as you add these details. Common mistakes include making petals too uniform; strive for variety in shape and size to enhance realism.
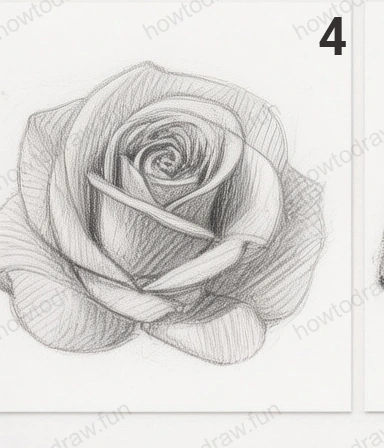
Step 4:
In this step, begin to add shading to create depth. Use a softer pencil to apply shading in the areas where the petals overlap and where shadows naturally fall. Blend your pencil strokes gently to avoid harsh lines; you can use a blending stump or your finger for this purpose. The shading should enhance the three-dimensionality of the rose, so focus on areas that would naturally catch light and those that would remain darker. This is a critical step for adding realism, so take your time to build up the layers gradually.
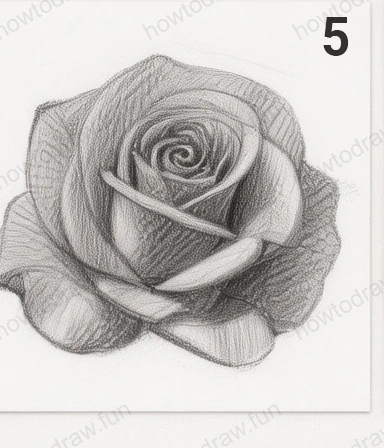
Step 5:
Continue enhancing the shading and texture of the rose. At this stage, go back to the petals and deepen the shadows for a more dramatic effect. Add highlights to the edges where the light would hit, using an eraser to gently lift graphite. You can also add more fine lines to suggest the delicate veins of the petals. Pay careful attention to the overall balance of light and dark throughout the drawing; this will help unify the piece and make it more visually appealing. Be cautious not to overwork the shading, as it can lead to a muddy appearance.
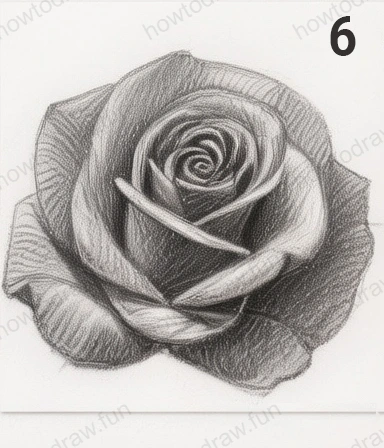
Step 6:
Finally, add the finishing touches. Look over your drawing and assess areas that might need further refinement. Darken any shadows that need emphasis and lighten highlights to enhance contrast. You may also want to define the edges of the petals more distinctly to make them pop. Once satisfied, consider using a fixative spray to preserve your artwork. Remember, practice is key; don’t hesitate to try drawing more roses or experimenting with different styles. Each attempt will enhance your skills.
In conclusion, you have learned to draw a beautiful, realistic rose through a series of structured steps. This process has helped you develop essential skills in sketching, shading, and detailing that you can apply to other drawings. Remember that drawing is a journey; keep practicing, exploring different techniques, and don’t shy away from making mistakes. You can experiment with variations, such as different flower types or colors. Keep your creativity flowing and enjoy the art of drawing!
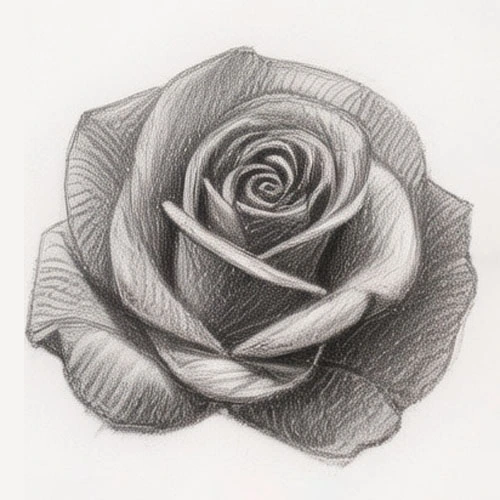
Reference Image
Here's the complete reference image: