How to Draw a Detailed Dragon
Learn to draw a detailed dragon through step-by-step instructions, focusing on shapes, shading, and realistic features.
How to Draw a Detailed Dragon
Drawing a dragon can be an exciting and rewarding project for artists at any level. In this tutorial, you'll learn how to create a stunning dragon illustration from scratch. We will focus on the basic shapes, shading techniques, and line work that will help bring your dragon to life. Whether you are a seasoned artist or just starting out, follow along to develop your skills.
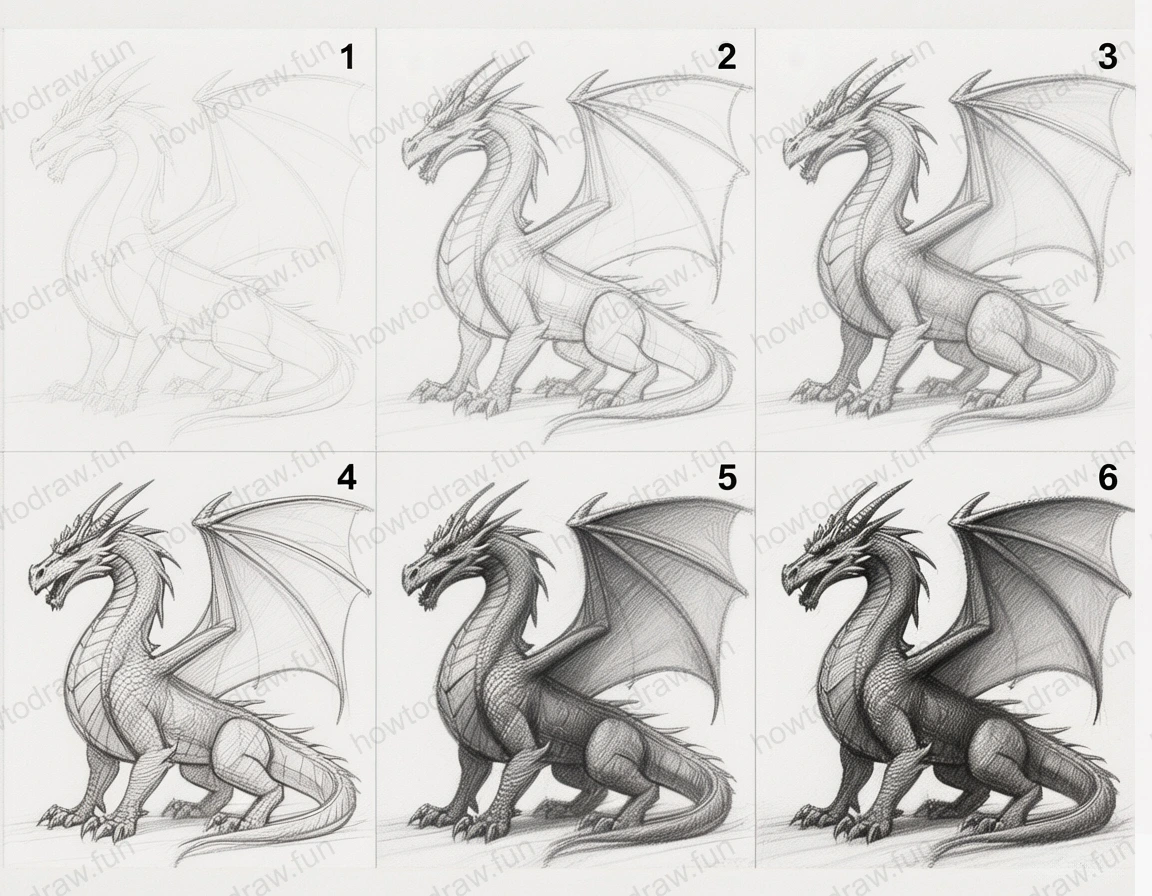
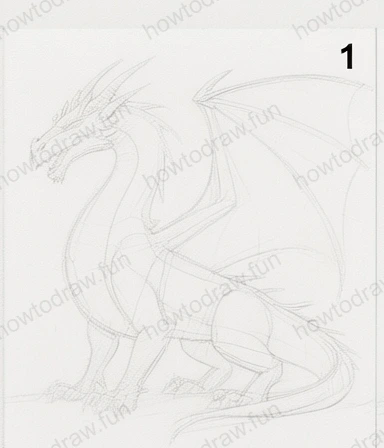
Step 1:
Begin by sketching the basic shapes of the dragon. Start with a large oval for the body and add circles for the head and joints. Lightly outline the wings with triangle shapes and use curved lines to indicate the tail. Ensure the proportions feel right; the head should be smaller than the body, and the wings should appear large enough to support flight. Use a light pencil to avoid harsh lines, making it easier to adjust shapes as needed. Common mistakes include making the head too large or the wings too small, so keep checking your proportions. Tip: Keep your lines light and fluid to allow for adjustments.
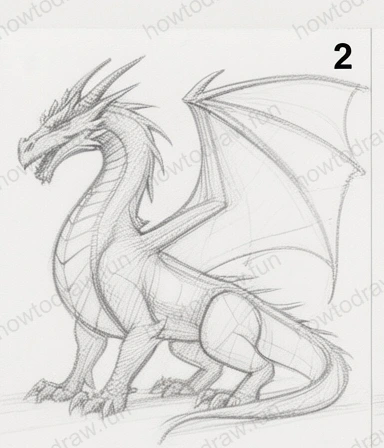
Step 2:
Refine the shapes by adding more detail. Define the dragon's anatomy by outlining the muscle structures and features such as the jawline and claws. Start to give the wings a more defined outline, focusing on the curves and edges. At this stage, remember to maintain the light sketching technique, allowing you to erase easily if necessary. Pay attention to the placement of the legs and tail; they should connect fluidly to the body. A common mistake here is to draw static shapes; instead, aim for a sense of motion by curving the lines slightly. Tip: Visualize the dragon in motion to enhance your drawing’s dynamism.
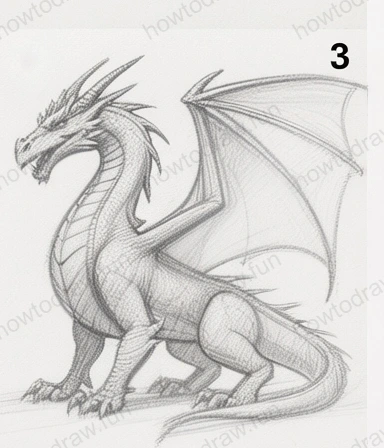
Step 3:
Now, it’s time to add texture and details. Start sketching the scales along the body and wings using small, overlapping shapes. Begin detailing the face, including the eyes, nostrils, and mouth. Pay special attention to the proportions of the facial features, ensuring they convey expression. Use short, curved lines to create the appearance of scales, making them smaller as they move away from the focal point. A common pitfall is making scales too uniform; strive for variety in size and shape for a more realistic look. Tip: Refer to references of dragons or reptiles to understand scale placement better.
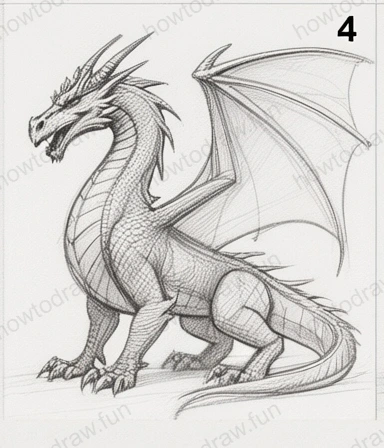
Step 4:
With the basic details in place, begin shading your dragon to create depth. Start with a light pencil to add shadows on one side of the body, emphasizing the light source. Use a blending tool or your finger to smooth out the shading for a more natural look. Pay careful attention to the areas under the wings and around the joints, where shadows naturally fall. A common mistake is overdoing the shading; instead, build it up gradually to avoid harsh contrasts. Tip: Use a reference image to determine where shadows and highlights should be placed for a more realistic effect.
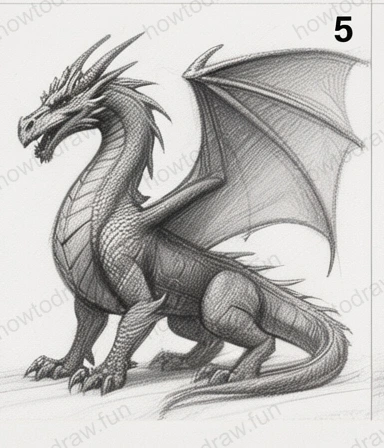
Step 5:
Continue refining your shading and add highlights. Use an eraser to lift graphite in areas where light hits, such as the tips of the scales or along the wings. This contrast between light and dark will give your dragon a three-dimensional feel. Focus on the features of the face; the eyes should glimmer with highlights to bring them to life. Be cautious of making the highlights too stark; they should complement the overall shading. Tip: Experiment with different pencil pressures to achieve varied tonal values for a more dynamic appearance.
Step 6:
Finalize your dragon by deepening the shadows and adding intricate details. Use a darker pencil to enhance the contours of the wings, body, and face. Clean up any stray lines and ensure that your shading is cohesive. You may want to add additional elements like a background for context. A common mistake is neglecting the background; a simple ground line can ground your dragon in space. Tip: Consider adding elements like clouds or mountains to enhance the overall composition.
In conclusion, you have learned how to draw a dragon through detailed steps, focusing on shapes, shading, and texture. Practice is key in refining your drawing skills, so don't hesitate to experiment with different styles and techniques. Consider trying variations, such as different poses or color schemes, to further develop your artistic abilities. Keep drawing, and embrace the journey of improvement!
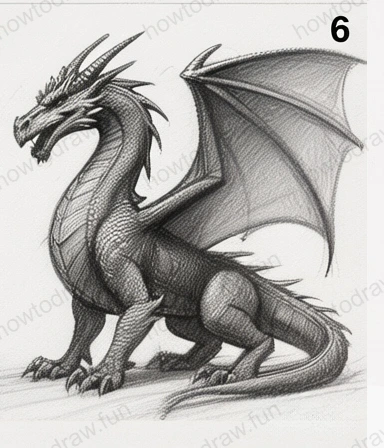
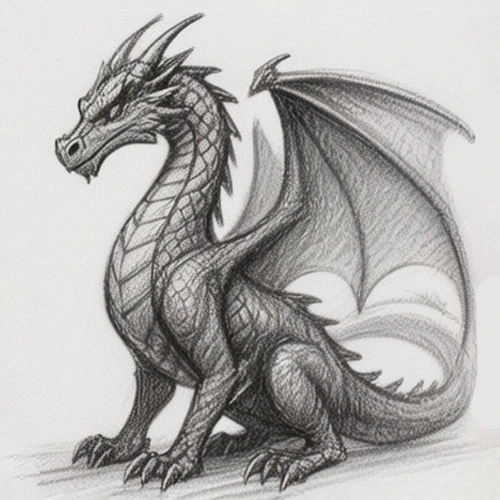
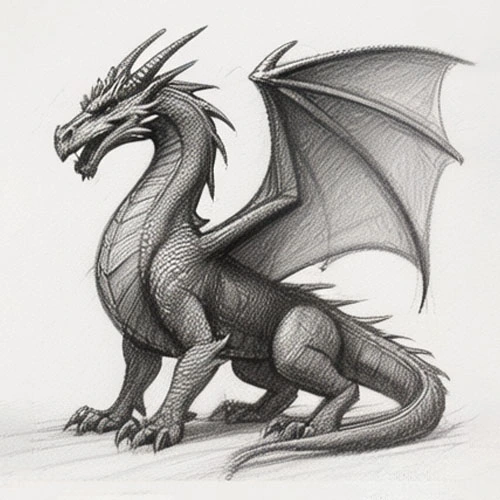
Reference Image
Here's the complete reference image: