How to Draw a Dragon
In this tutorial, you'll learn how to draw a majestic dragon, focusing on shapes, shading, and details to bring your artwork to life.
How to Draw a Dragon
Drawing a dragon can be an exciting challenge! In this tutorial, you'll learn how to create a stunning dragon illustration from basic shapes to detailed shading. Each step will guide you through the process, ensuring that you grasp essential techniques for drawing and shading.
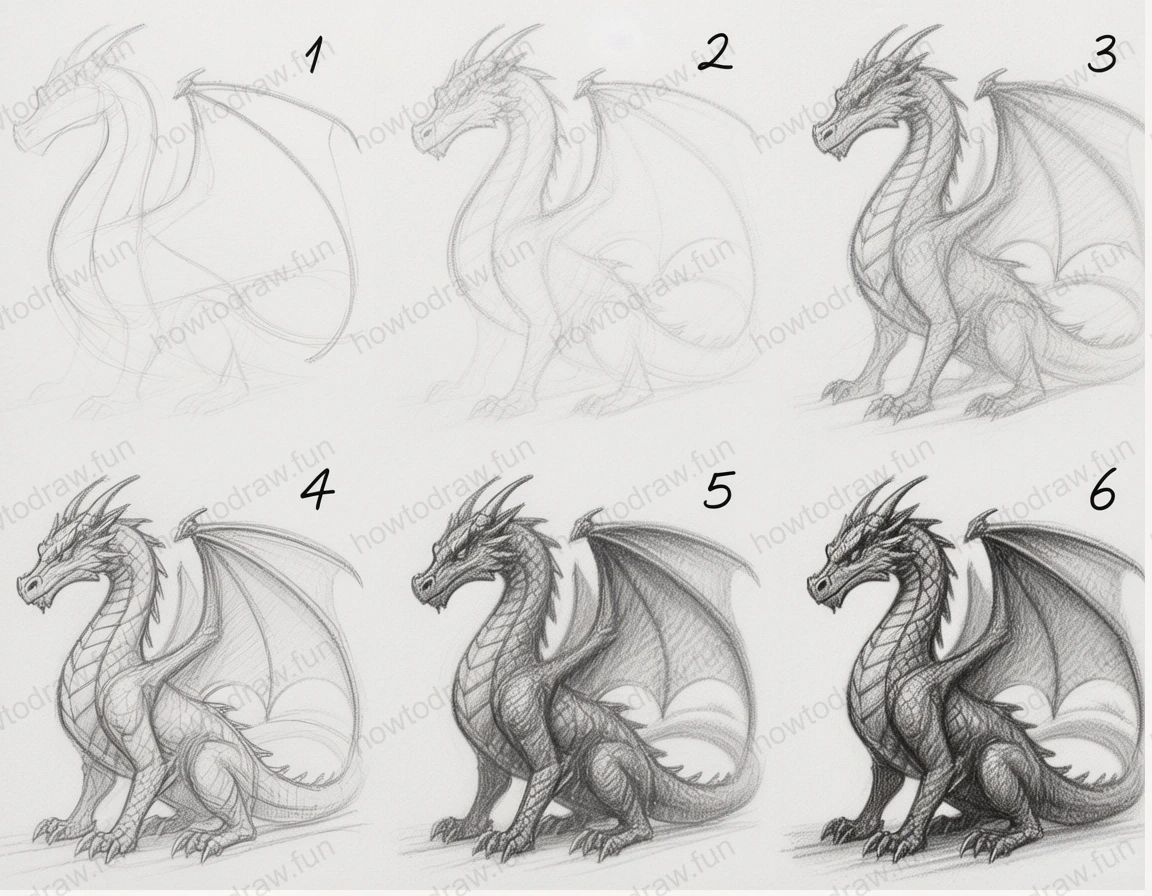
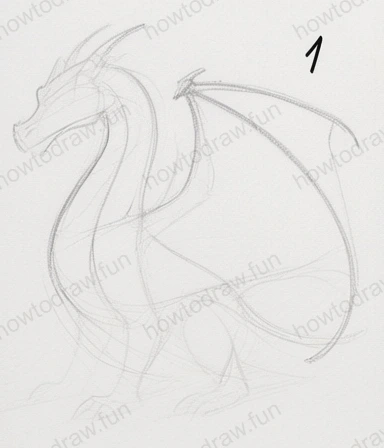
Step 1:
In the first step, start with basic shapes to outline the dragon's body. Use light pencil strokes to create an elongated oval for the body and a smaller circle for the head. Sketch the neck connecting the head to the body, and add simple lines for the wings and legs. At this stage, focus on proportions—make sure the neck is not too thick or too thin compared to the body. It’s important to maintain a light hand, as these lines will guide your later details. Avoid pressing too hard with your pencil, as these initial shapes should be easy to erase if adjustments are needed.
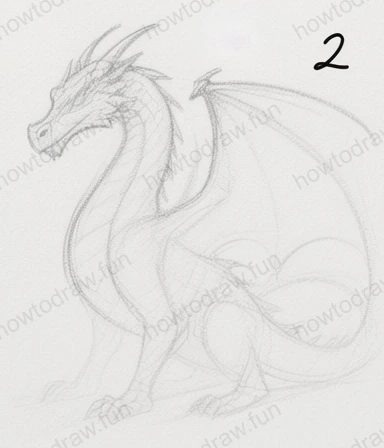
Step 2:
In the second step, begin refining the initial shapes. Start to define the head's features, such as the eyes and snout. Add curves to the neck for a more natural appearance. For the wings, draw the bone structure and outline the wing's shape, ensuring they look dynamic and ready for flight. Pay attention to the proportions of the wings compared to the body; they should appear powerful yet graceful. This is also the stage to correct any shapes that seem off. Lightly sketch in details like scales along the body and the claws on the feet to add character.
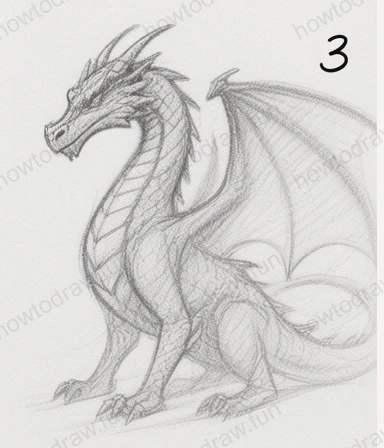
Step 3:
In this step, focus on enhancing the dragon's anatomy. Start adding definition to the limbs and wings, emphasizing the muscle structure with subtle curves. Refine the head's features, making the eyes larger and more expressive. Use short lines to indicate scales across the body and wings, creating a textured look. Make sure to add details to the claws, ensuring they appear sharp and menacing. Pay close attention to the balance of your lines; the dragon should look both powerful and agile. This step sets the foundation for the shading to come.
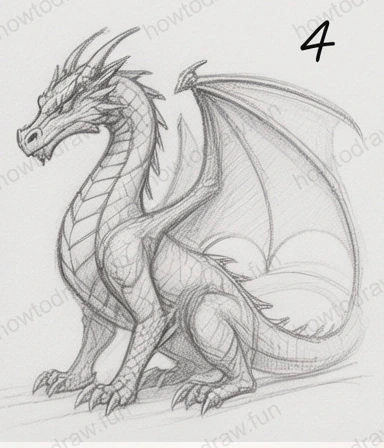
Step 4:
Now it’s time to introduce shading! Begin by identifying the light source in your drawing. Use soft pencil strokes to shade one side of the dragon, starting with a light touch and gradually building the darkness. Focus on creating shadows under the neck, wings, and body to give depth. Avoid over-shading; keep it light enough to preserve some highlights on the scales. Blend the pencil marks gently with a tissue or blending stump for smoother transitions. This step is crucial for making your dragon look three-dimensional, so take your time.
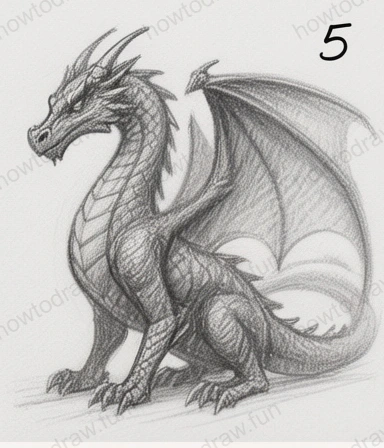
Step 5:
As you move to the fifth step, continue refining your shading. Darken the shadows where necessary, particularly under the belly and in the creases of the wings. Use a hatching technique for areas requiring more texture, like the scales or the dragon's back. Add highlights where the light hits, ensuring the contrast between light and shadow is striking. Don’t forget to check your proportions again and adjust any lines that might have gotten too dark. This step enhances the overall realism of your drawing, making it come to life.
Step 6:
In the final step, finalize your drawing by deepening the shadows and enhancing any details that might need more definition. Use your eraser to lift off some graphite in areas where the light hits most, creating sharp highlights. Add any additional scales or texture that enhances the overall appearance. This is your opportunity to refine the final features and ensure everything looks cohesive. Take a moment to step back and assess your work, making any last-minute adjustments. Once satisfied, you have completed your dragon illustration!
In conclusion, you’ve learned how to draw a dragon step-by-step, from basic shapes to the final shading. This tutorial emphasized the importance of proportions, light sources, and refining details. Remember, practice is key to honing your skills. Try experimenting with different poses or styles for your dragon, or explore other mythical creatures. Keep drawing and enjoy the creative journey!
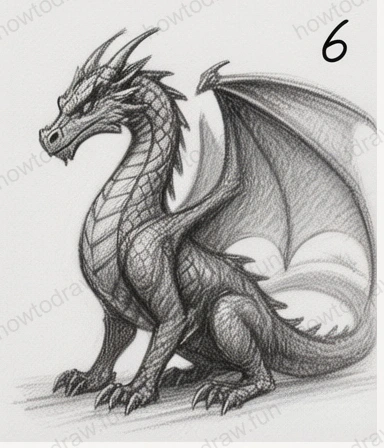
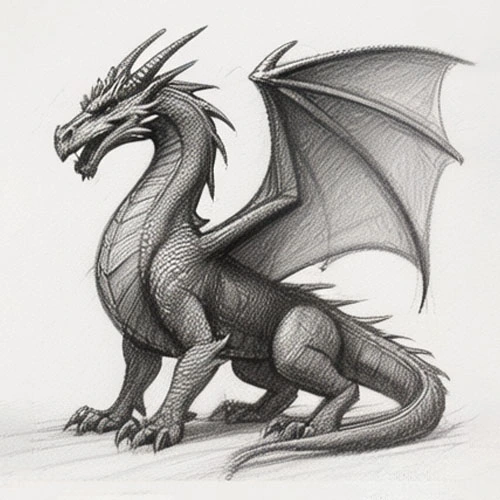
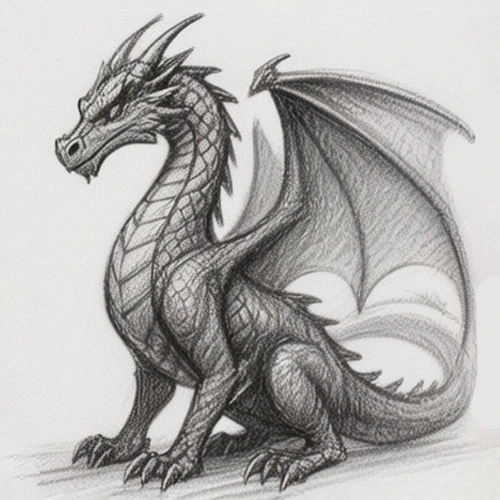
Reference Image
Here's the complete reference image: