How to Draw a Realistic Male Face
Learn to draw a realistic male face step-by-step, mastering shapes, shading, and proportions for a lifelike portrait.
How to Draw a Realistic Male Face
Creating a realistic face can be a rewarding challenge for artists of all levels. In this tutorial, we will guide you through each step of the process, from initial shapes to the final shading. By following these detailed instructions, you will learn essential techniques that will enhance your drawing skills and help you capture lifelike features.
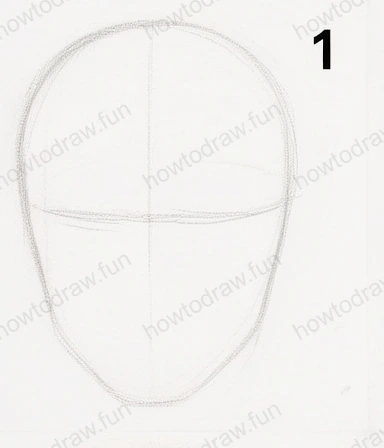
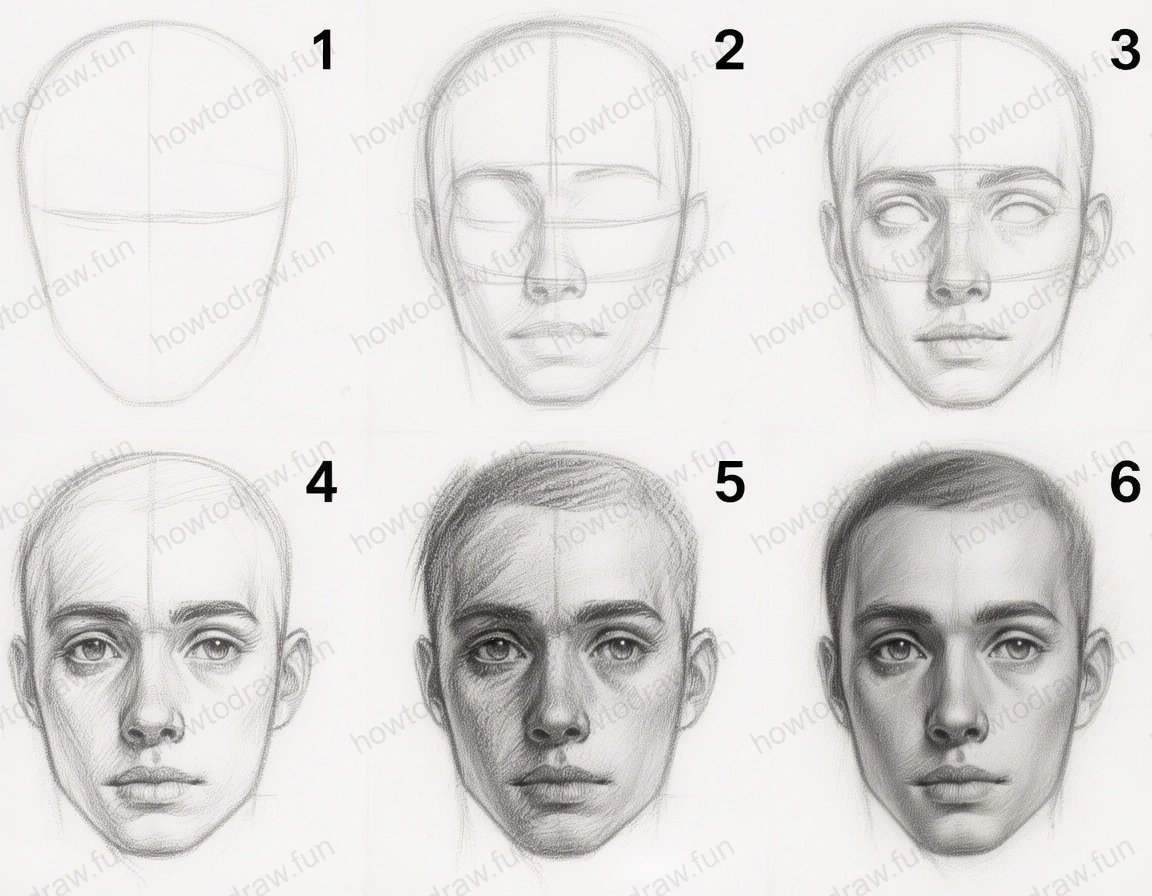
Step 1:
Start by drawing the basic shape of the head. This is usually an oval or an egg shape, slightly wider at the top. Ensure to draw a horizontal line across the middle to help position the eyes later. Add a vertical line down the center to divide the face into equal halves, assisting with symmetry. Keep your pencil strokes light; this will allow for easy erasing and adjustments as you refine your drawing. A common mistake is making the head too narrow or too wide, so take your time to get the proportions correct.
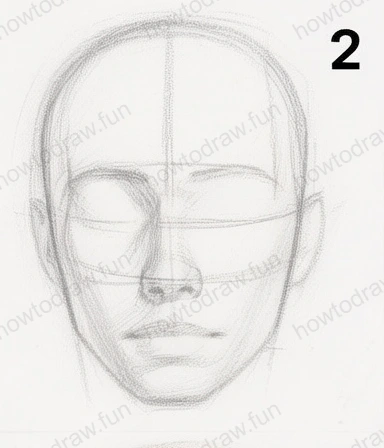
Step 2:
In this step, begin detailing the facial features. Draw the outlines of the eyes, nose, and mouth, utilizing the guidelines from Step 1. The eyes should sit on the horizontal line you created earlier, spaced about an eye's width apart. Lightly sketch the nose below the eyes, ensuring it aligns with the vertical line. The mouth should be positioned below the nose. Focus on keeping the features proportional and avoid pressing too hard with your pencil; a light touch will allow for adjustments.
Step 3:
Next, refine the shape of the face and add in more details. Adjust the jawline and cheekbones according to your reference image. Start adding depth to the eyes by defining the eyelids and iris. Introduce light shading to suggest volume and form. Be mindful of the placement of shadows; this will add dimension to your drawing. A common error here is neglecting to observe the correct angles of the facial features, so refer to your guidelines frequently.

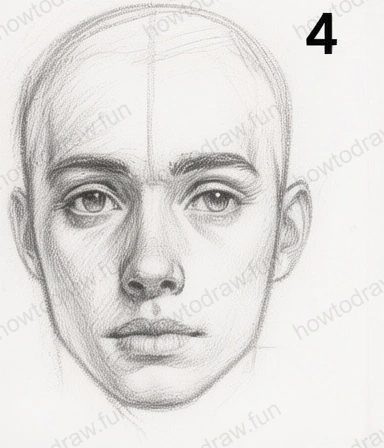
Step 4:
Now it’s time to focus on hair and additional features. Sketch the hairline and outline the hair’s shape, following the contours of the head. Use light, flowing strokes to create a sense of texture. Begin to add shadows around the face to provide depth, particularly under the chin and around the nose. Common mistakes include overcomplicating the hair or not paying attention to how it frames the face. Keep it simple and natural.
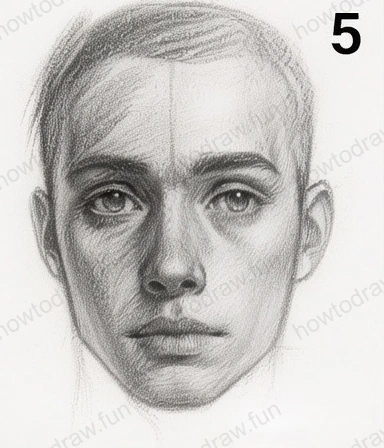
Step 5:
In this step, you will enhance the details of the eyes, lips, and shading. Darken the areas of the eyes, adding pupils and highlights to give them life. Define the lips by adding subtle curves and shading to indicate fullness. Continue to build up the shadows around the face for a more three-dimensional look, paying attention to light sources. A frequent mistake is rushing this step; take your time to create a balanced and realistic appearance.
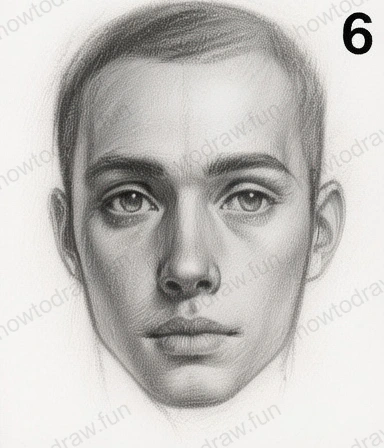
Step 6:
Finally, complete your drawing by adding finishing touches. Be sure to use your finger to blend all the shading together, refine all the features and deepen the shadows where necessary. Smooth out any rough edges and ensure your lines are clean and clear. Consider adding subtle highlights to the forehead and cheekbones to indicate light reflection. A common pitfall is overworking the drawing; know when to stop. Step back, assess your work, and make any minor adjustments before finalizing.
In conclusion, drawing a realistic face requires patience and practice. Throughout this tutorial, you learned how to build a face step by step, focusing on shapes, proportions, and shading techniques. Remember, the key to improvement is consistent practice and experimentation. Don't hesitate to try different expressions or angles as you become more comfortable with these techniques. Keep drawing, and enjoy the journey of enhancing your artistic skills!
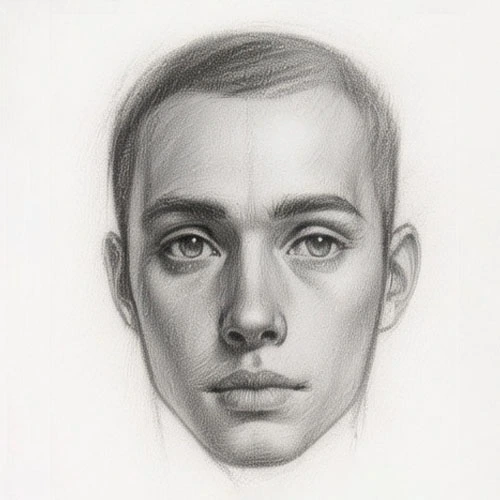
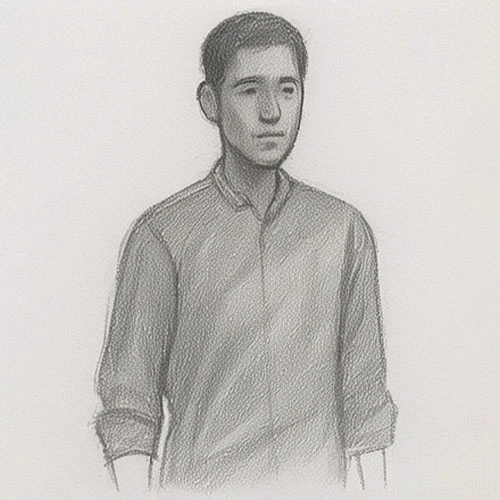
Reference Image
Here's the complete reference image:
More Advanced Tutorials
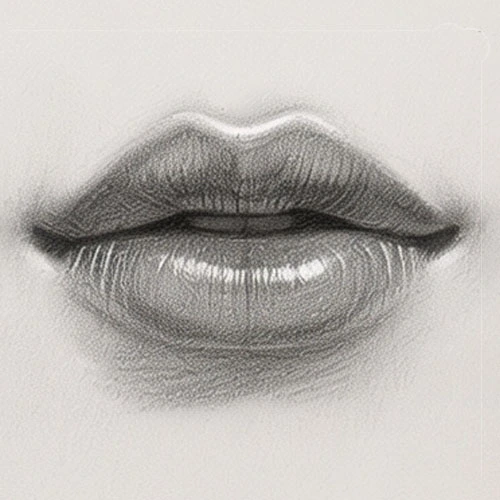
How to Draw Realistic Female Lips
Learn to draw realistic female lips step by step, mastering shapes, shading techniques, and details for stunning results.

How to Draw a Realistic Female Eye
Learn to draw a realistic female eye with detailed shading, proportions, and textures. This tutorial guides you through every step for stunning results.
Ready for Intermediate Tutorials?
How to Draw a Realistic Male Person
Learn to sketch a detailed realistic male person step by step using basic shapes and shading techniques.
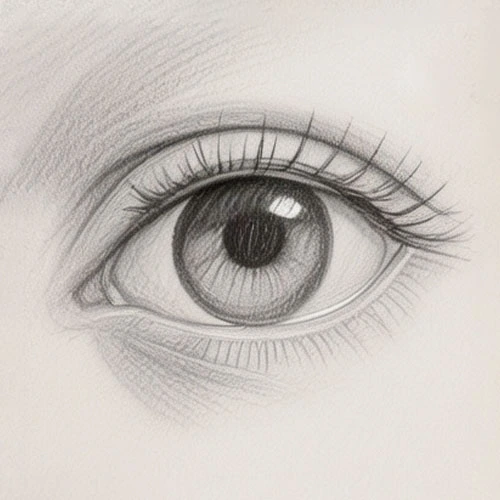
How to Draw a Realistic Eye
Learn to sketch a realistic eye step by step, focusing on shapes, shading, and details for a lifelike appearance.