How to Draw Realistic Female Lips
Learn to draw realistic female lips step by step, mastering shapes, shading techniques, and details for stunning results.
How to Draw Realistic Female Lips
In this tutorial, we’ll explore how to draw realistic lips through a step-by-step process. Drawing lips may seem daunting, but with the right techniques and practice, you can create stunning results. We'll focus on basic shapes, shading, and detailing to bring your drawing to life.
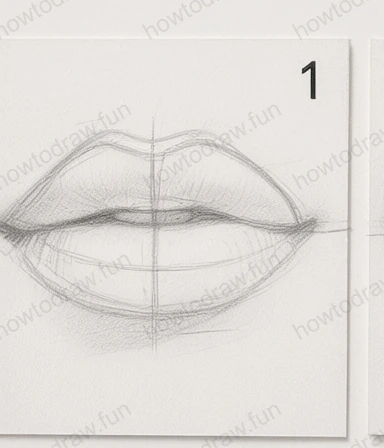
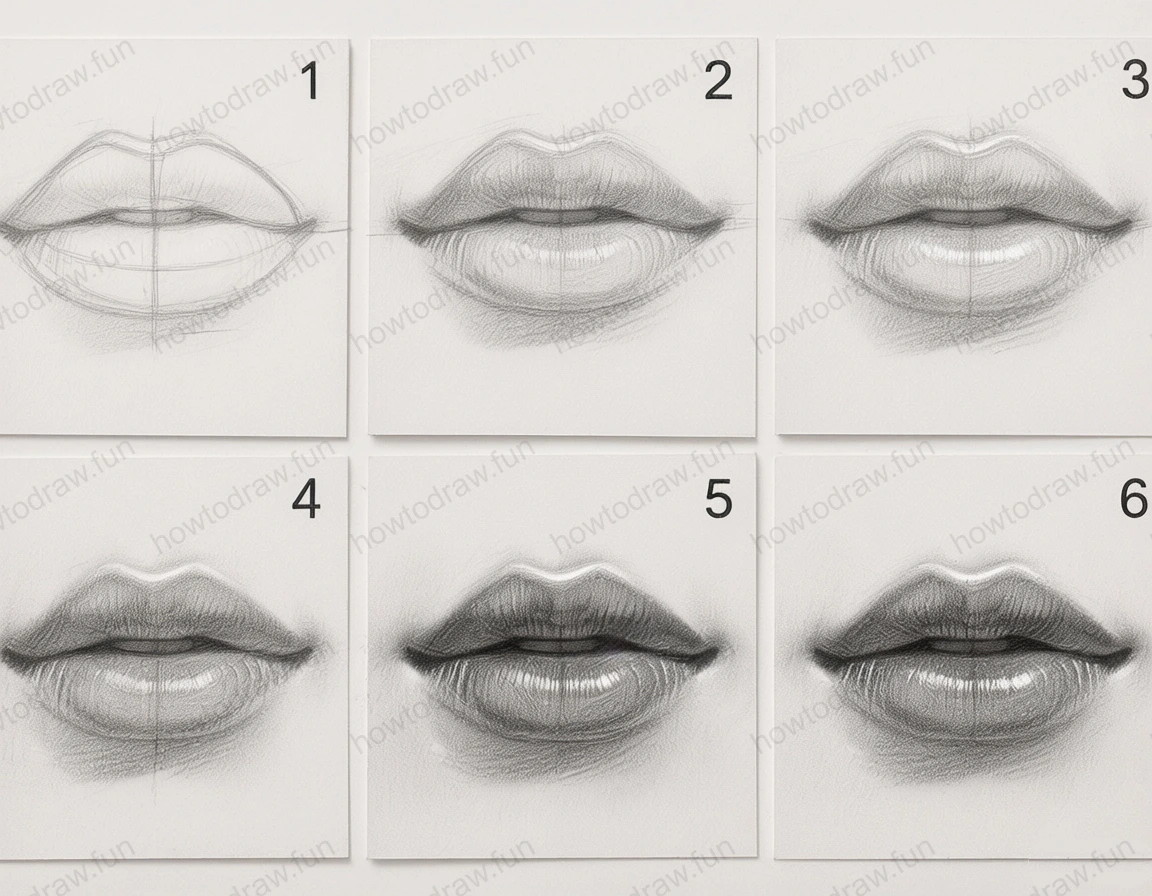
Step 1:
Begin by sketching the basic outline of the lips. Start with a light pencil to create a horizontal line that represents the center of the lips. Add a basic M shape for the upper lip and a rounded shape for the lower lip. Make sure the proportions look balanced; the upper lip should be slightly thinner than the lower one. Be cautious with the curvature to avoid making the lips look too flat or too exaggerated. Use light strokes to adjust the shape as needed, ensuring you have a solid foundation before proceeding to the next step.
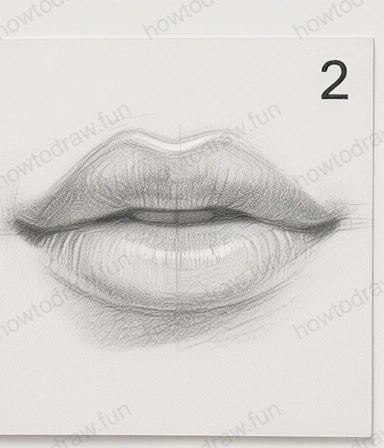
Step 2:
In this step, refine the outline of the lips by adding more detail to the shape. Define the cupid's bow on the upper lip and the curve of the lower lip more distinctly. Begin to indicate the line that separates the upper and lower lips. This is crucial for creating depth. Use a blending stump to smooth out the lines, giving the lips a more natural appearance. Pay attention to the symmetry, as uneven lines can lead to an unrealistic look. Lightly erase any unnecessary sketch lines to keep the focus on the refined shape.
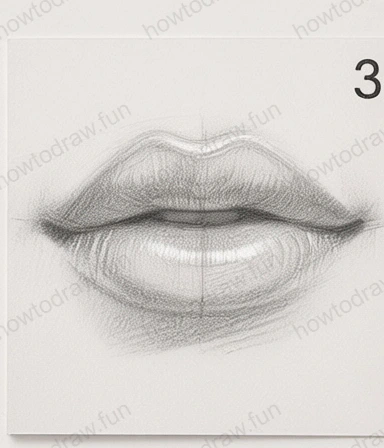
Step 3:
Now it’s time to add shading to create volume. Start shading the upper lip with gentle strokes, considering where the light would naturally hit. Use a soft pencil for darker areas and a hard pencil for highlights. Gradually build up the shading, starting light and increasing darkness in areas that curve inward. Remember, the corners of the lips are often darker, so focus your shading there. This step is vital for achieving a three-dimensional effect, so take your time.
Step 4:
Continue enhancing the depth by adding more shading and highlights. Focus on the inner parts of the lips, using a smooth blending technique to create a gradient effect. Highlight the areas where light reflects off the lip's surface, which is essential for realism. Use your kneaded eraser to lift some graphite and create subtle highlights, especially on the lower lip where light hits. This step helps to add more character to the lips, making them appear more lifelike.

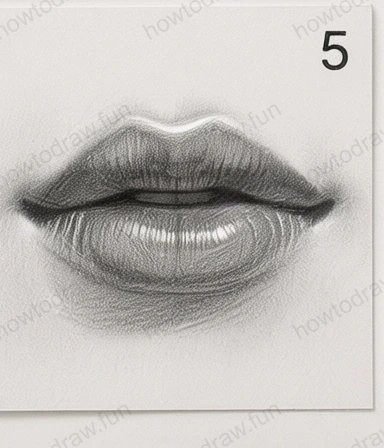
Step 5:
In this step, refine your shading further by adding texture to the lips. Use short, gentle strokes to illustrate the natural lines and creases found in real lips. Pay attention to the direction of your strokes; they should follow the natural curves of the lips. Add darker shading in the creases to emphasize their depth. This step is crucial for realism, so don’t rush it. Keep blending and adjusting until you’re satisfied with the texture.
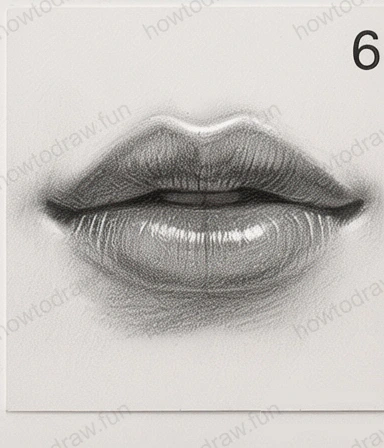
Step 6:
Final touches are now essential. Assess your drawing for balance and proportion, making minor adjustments as needed. Use a fine pencil to define edges and enhance the highlights on the lip, making them pop. You can also darken the areas around the lips slightly to create contrast, drawing attention to your work. Finally, step back and admire your drawing. Make any last-minute adjustments to ensure you’re happy with the overall look. Remember, practice makes perfect!
In conclusion, drawing realistic lips involves understanding shapes, shading, and details. By practicing these steps, you can improve your drawing skills significantly. Don’t hesitate to experiment with different lip shapes and expressions to develop your style. The more you draw, the more confident you’ll become. Keep practicing and remember that every artist has their unique journey!
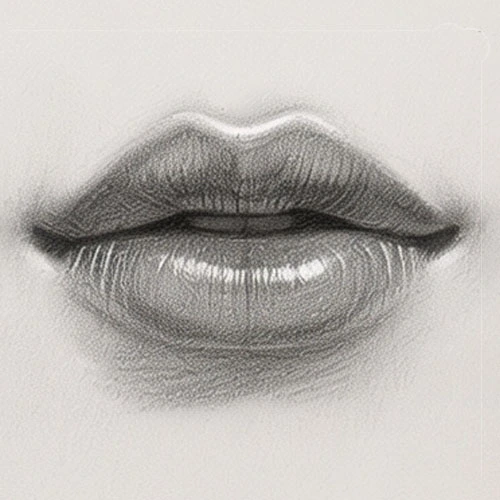
Reference Image
Here's the complete reference image:
More Advanced Tutorials

How to Draw a Realistic Female Eye
Learn to draw a realistic female eye with detailed shading, proportions, and textures. This tutorial guides you through every step for stunning results.
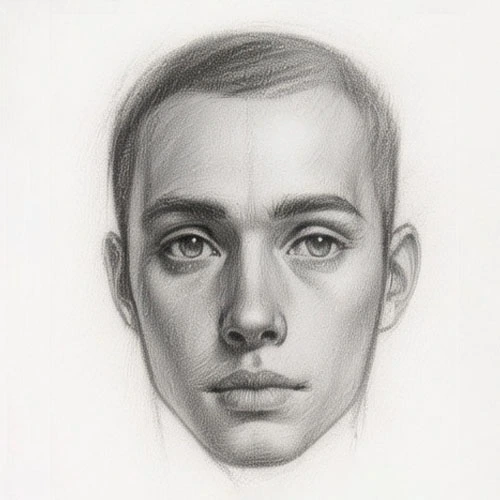
How to Draw a Realistic Male Face
Learn to draw a realistic male face step-by-step, mastering shapes, shading, and proportions for a lifelike portrait.
Ready for Intermediate Tutorials?

How to Draw a Realistic Male Person
Learn to sketch a detailed realistic male person step by step using basic shapes and shading techniques.
How to Draw a Realistic Eye
Learn to sketch a realistic eye step by step, focusing on shapes, shading, and details for a lifelike appearance.