How to Draw a Realistic Male Person
Learn to sketch a detailed realistic male person step by step using basic shapes and shading techniques.
How to Draw a Realistic Male Person
Creating a realistic portrait can be a rewarding challenge. In this tutorial, you'll learn how to sketch a detailed portrait step by step. By starting with basic shapes and gradually adding details, you'll develop skills in proportion, shading, and texture. Grab your pencil and paper, and let’s get started!
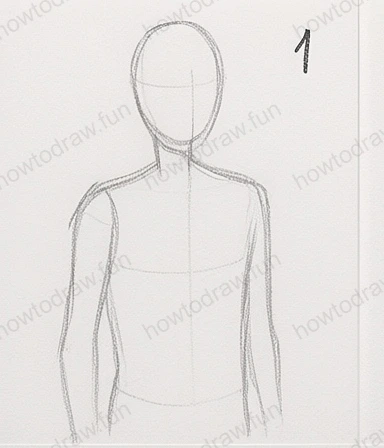
Step 1:
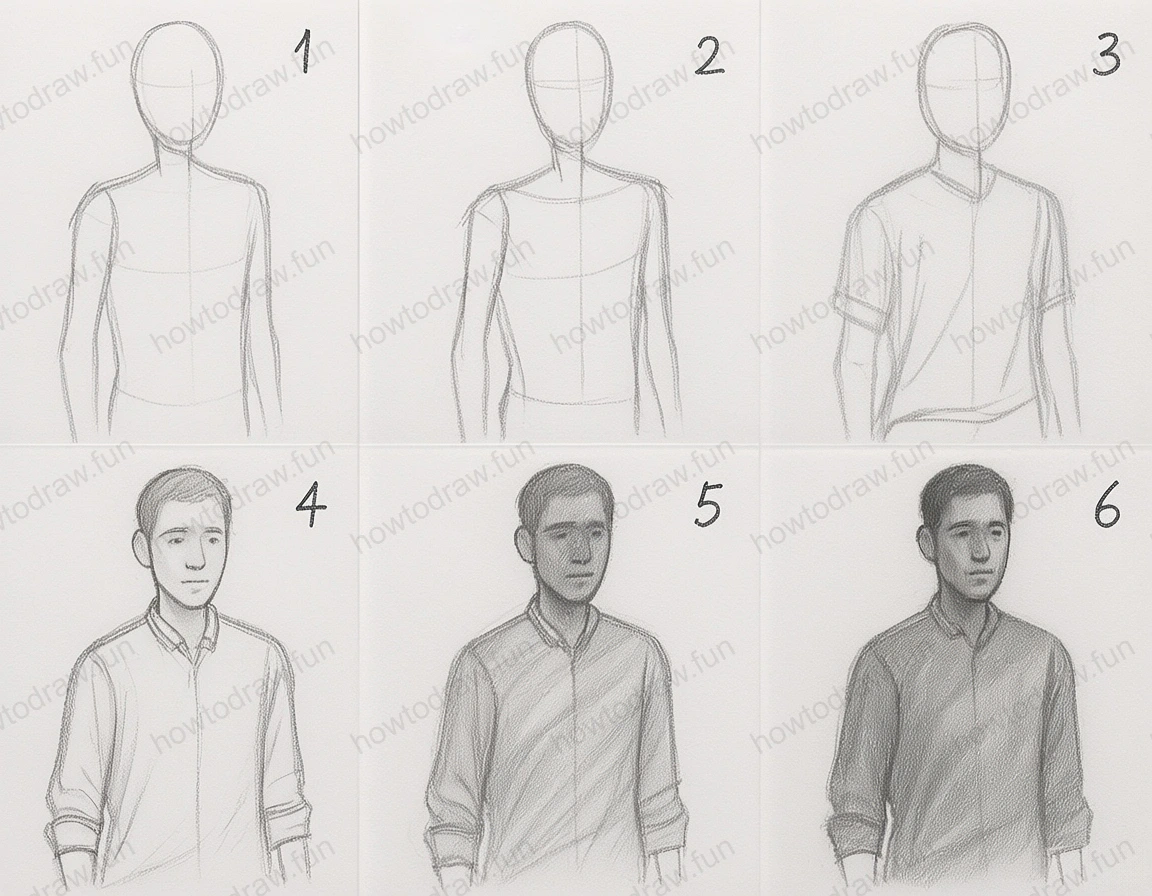
In this first step, you will begin by sketching the basic outline of the head and torso. Start by drawing a circle for the head, ensuring it's proportional to the body. Add a vertical line down the center of the circle to help with symmetry, and a horizontal line for the eye level. Sketch a simple rectangle for the torso below, ensuring it connects smoothly to the head. Remember to keep your lines light; this will allow for adjustments later. Avoid pressing too hard, as you may want to erase parts of the sketch as you refine your drawing. Common mistakes include making the head too large or the torso too short, so double-check your proportions as you go.
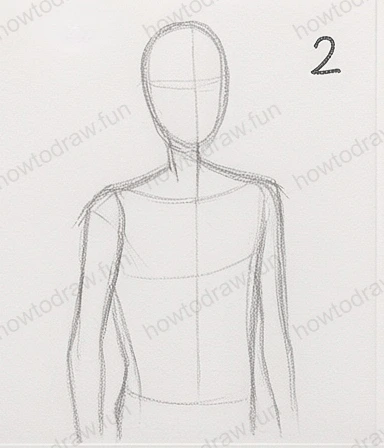
Step 2:
Now, refine the shape of the head and add the shoulders. Start by softening the circular outline at the sides to form a more oval shape for the head. Draw the shoulder lines extending from the neck area, ensuring they are proportionate to the head. At this stage, add the guidelines for the neck and arms; this will help you maintain proper proportions. Make sure the shoulders are not too wide or narrow compared to the head. Focus on maintaining the balance of the figure. Light lines are still essential here, as they will serve as a base for the more defined shapes to come.
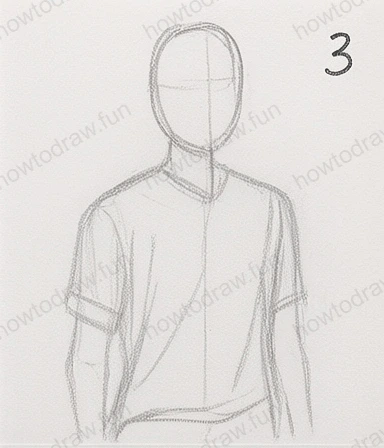
Step 3:
In this step, you will start adding clothing details. Draw a V-shaped neckline for the shirt, ensuring it looks natural and follows the contours of the shoulders. Extend the lines down for the sleeves, keeping them loose to suggest movement. Pay attention to the proportions of the arms; they should not be too thick or thin. Add more detail to the shirt, like folds or creases, to give a sense of realism. As you sketch, think about where the light source will come from, as this will affect how you later shade the fabric. Keep everything light and fluid, allowing room for adjustments.
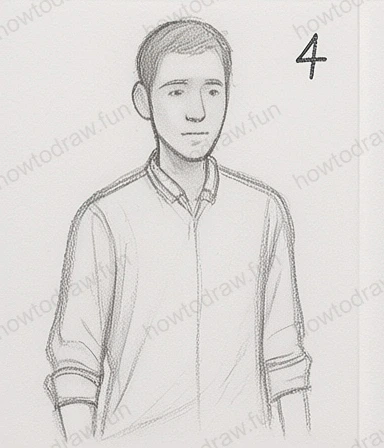
Step 4:
Now, it’s time to sketch the facial features. Start with the eyes, placing them along the horizontal guideline you created earlier. Use basic shapes to outline the eyes, nose, and mouth. Pay attention to the symmetry and spacing between features; the eyes should be about one eye-width apart. Add the ears to the sides of the head, aligning them with the eyes. As you define the features, remember to keep your lines light so you can adjust them easily. A common mistake is making the features too large or too small, so frequently check your proportions as you work.
Step 5:
Begin shading the face and clothing to add depth. Use light pencil strokes to create gradients for the skin tone, focusing on the areas where shadows naturally occur, like under the chin and around the nose. For the shirt, apply a darker shade to the areas where the fabric folds. Blend the pencil marks gently with your fingers or a blending stump for a smooth transition. Be careful not to overdo it; subtle shading is key for realism. Keep in mind that less is often more, and build up your shades gradually. Common pitfalls include harsh lines and over-shading, so aim for a soft, natural look.

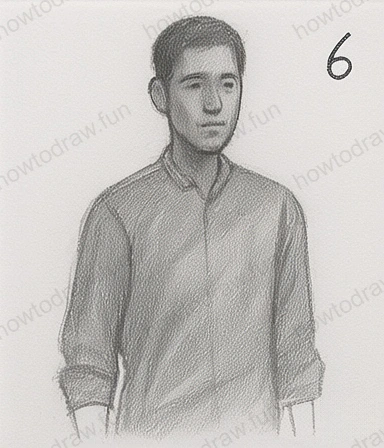
Step 6:
In the final step, refine your portrait by adding final details and highlights. Go back to the facial features and add necessary details, such as eyelashes or highlights in the eyes to make them more lifelike. Darken the outlines of the face and clothing where needed, but avoid making the lines too harsh. Use an eraser to bring out highlights, especially on the forehead and nose. Step back and assess your work; make any necessary adjustments to proportions or shading. This is your chance to polish your drawing and make it truly come to life. Remember, practice makes perfect, so don’t be afraid to try again!
In conclusion, this tutorial has guided you through the process of creating a realistic portrait step by step. You’ve learned to start with basic shapes, refine details, and apply shading techniques to achieve depth. Each step was designed to build your confidence and skills, so don’t hesitate to practice what you’ve learned. Experiment with different expressions or angles for your portraits, and remember that every artist has their unique style. Keep drawing, and enjoy the journey of artistic expression!
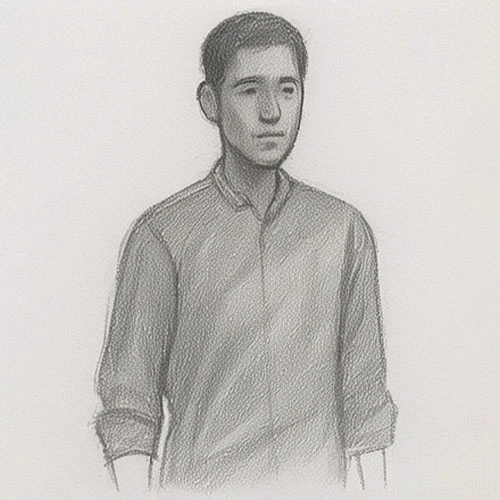
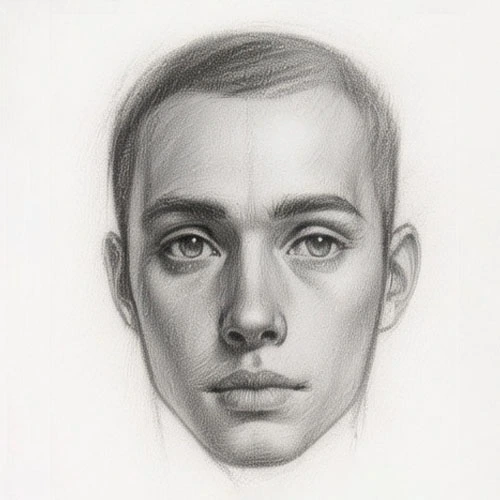
Reference Image
Here's the complete reference image:
More Intermediate Tutorials
Challenge Yourself with Advanced Tutorials
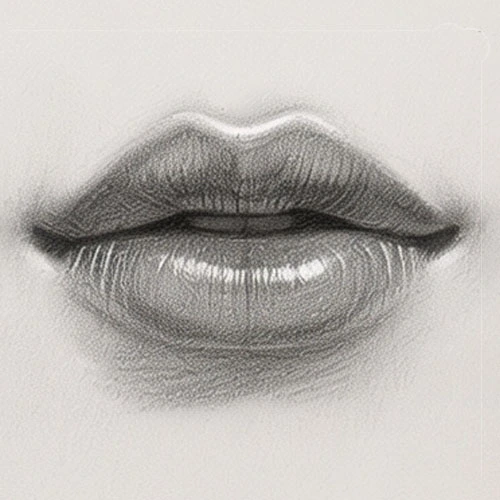
How to Draw Realistic Female Lips
Learn to draw realistic female lips step by step, mastering shapes, shading techniques, and details for stunning results.

How to Draw a Realistic Female Eye
Learn to draw a realistic female eye with detailed shading, proportions, and textures. This tutorial guides you through every step for stunning results.
How to Draw a Realistic Male Face
Learn to draw a realistic male face step-by-step, mastering shapes, shading, and proportions for a lifelike portrait.