How to Draw a Realistic Eye
Learn to sketch a realistic eye step by step, focusing on shapes, shading, and details for a lifelike appearance.
How to Draw a Realistic Eye
In this tutorial, you will learn how to draw a realistic eye through a detailed step-by-step process. By following each step, you will master the essential shapes, lines, and shading techniques needed to create a lifelike depiction of an eye. Whether you're a beginner or looking to refine your skills, this guide will provide you with the tools to succeed.
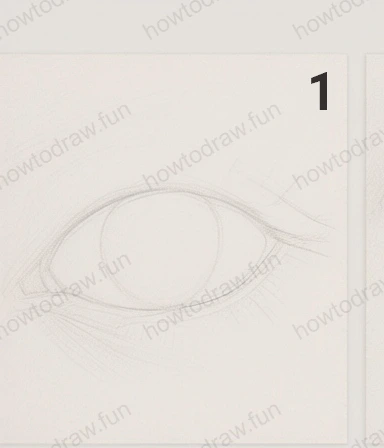
Step 1:
Begin your drawing by sketching the basic shape of the eye. Start with a light pencil to create an oval shape that will outline the eye. Ensure the oval is slightly tilted for a natural look. Inside this oval, draw a smaller circle for the iris. Pay attention to the proportions; the iris should take up about a third of the eye’s height. You can add a faint line for the eyelid at the top, which will help guide your next steps. It’s important to keep your lines light at this stage to make adjustments easier later on. Common mistakes at this point include making the eye too round or misplacing the iris, so be sure to double-check your measurements.
Step 2:
In this step, refine the shape of the eyelid and add details to the eyelashes. Start by curving the upper eyelid more realistically, following the contour of the eye. Add a slight curve to the bottom eyelid as well. Then, begin sketching the eyelashes; these should be drawn with quick, light strokes that follow the natural growth direction. Remember, eyelashes are not uniform, so vary the lengths and angles for a more natural look. Pay attention to the spacing between the lashes as well. At this stage, ensure that the eye maintains a balanced look and make any necessary adjustments to the eyelids and eyelashes.

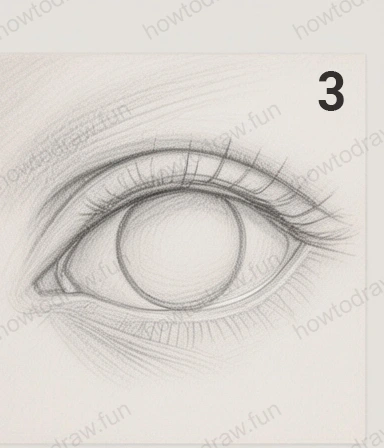
Step 3:
Now, focus on the details of the iris and pupil. Darken the circle of the iris and the pupil inside it, using gradual shading to create depth. The pupil should be the darkest part of the eye. Use a blending tool or your finger to gently smudge the edges of the iris to create a soft transition from light to dark. You can also lightly add texture to the iris by drawing fine lines radiating from the pupil outward, mimicking its natural patterns. Avoid making the iris too uniform; varying the shading will enhance realism. Be cautious not to overdo the shading, as subtlety is key here.
Step 4:
In this step, you will add depth to the eye by shading the area around it. Use a soft pencil to shade the skin around the eye, focusing on the eyelids and the areas underneath. Start with light strokes and gradually build up the darkness. Pay attention to the natural shadows created by the eyelid and the contours of the eye socket. This will help the eye appear more three-dimensional. Blend the pencil marks smoothly to avoid harsh lines. Keep in mind that common mistakes include leaving the skin area too white or not blending sufficiently, which can detract from the realism of your drawing.
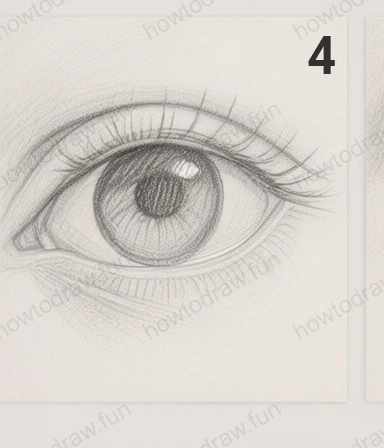
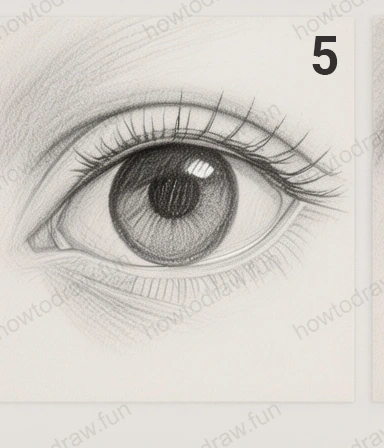
Step 5:
Next, enhance the details of the eyelashes and add highlights to the eye. Darken the eyelashes further, ensuring they stand out against the lighter skin tones. You may need to sharpen your pencil to create fine, crisp lines for the lashes. Then, lightly erase a small area on the pupil to create a highlight, which will give the eye a more lifelike appearance. Highlights should reflect light and can be placed in different areas depending on the light source. Be careful to maintain the overall balance and symmetry of the eye. Make sure the highlights are not too large, as subtlety is crucial for realism.
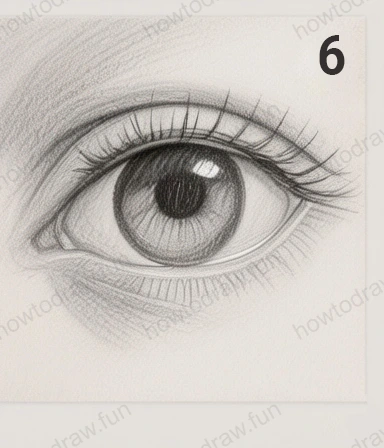
Step 6:
Finally, refine your drawing by adding finishing touches. Review the entire eye and adjust any areas that may need more detail or shading. You can enhance the depth of the iris by adding more varied tones and textures. Consider the light source and adjust the highlights and shadows accordingly. Use a clean eraser to sharpen any edges or highlights. This is also the time to step back and observe your drawing from a distance; often, this gives you a fresh perspective on any adjustments that need to be made. Remember, practice is key, so don’t hesitate to try this drawing multiple times!
In conclusion, you have learned how to draw a realistic eye from start to finish. This process involves understanding basic shapes, refining details, and applying shading techniques to create depth. Don’t hesitate to experiment with different styles or variations, such as changing the eye color or experimenting with different angles. The more you practice, the better you will become, so keep sketching and enjoy the journey of improving your art skills! Remember, every drawing is a step toward mastery.
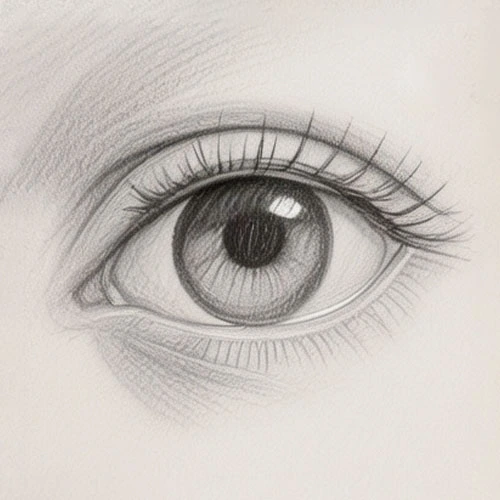
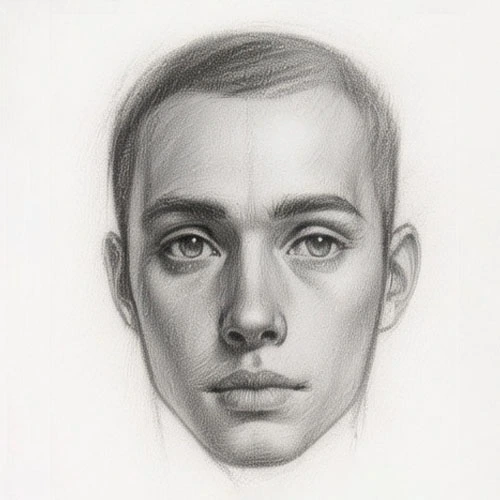
Reference Image
Here's the complete reference image:

More Intermediate Tutorials
Challenge Yourself with Advanced Tutorials
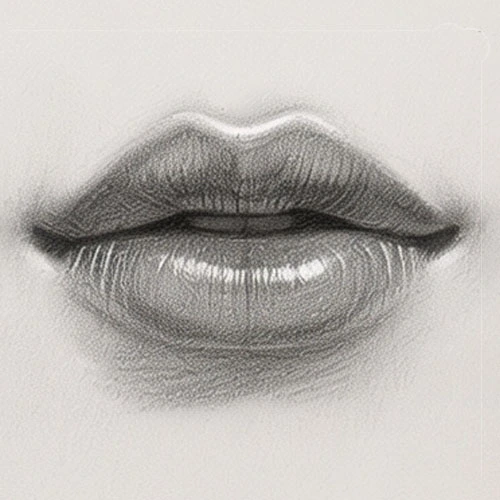
How to Draw Realistic Female Lips
Learn to draw realistic female lips step by step, mastering shapes, shading techniques, and details for stunning results.

How to Draw a Realistic Female Eye
Learn to draw a realistic female eye with detailed shading, proportions, and textures. This tutorial guides you through every step for stunning results.
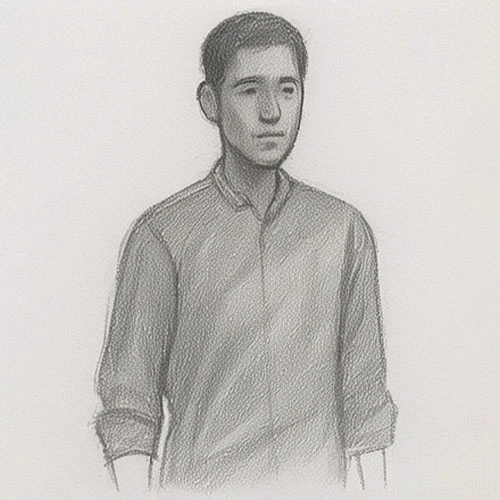
How to Draw a Realistic Male Face
Learn to draw a realistic male face step-by-step, mastering shapes, shading, and proportions for a lifelike portrait.