How to Draw a Dog
Learn to draw a realistic dog step-by-step, focusing on shapes, shading, and texture. Perfect for improving your drawing skills!
How to Draw a Dog
Welcome to this drawing tutorial where you will learn how to draw a realistic dog step-by-step. This guide will take you through the process from basic shapes to adding details and shading. Grab your pencil and paper, and let’s get started!
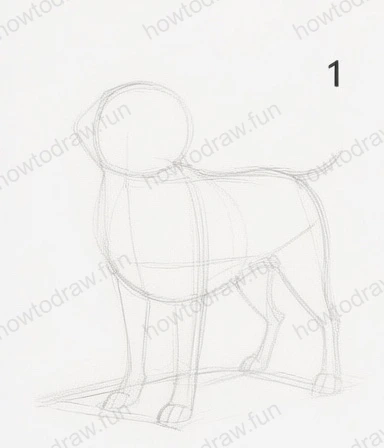
Step 1:
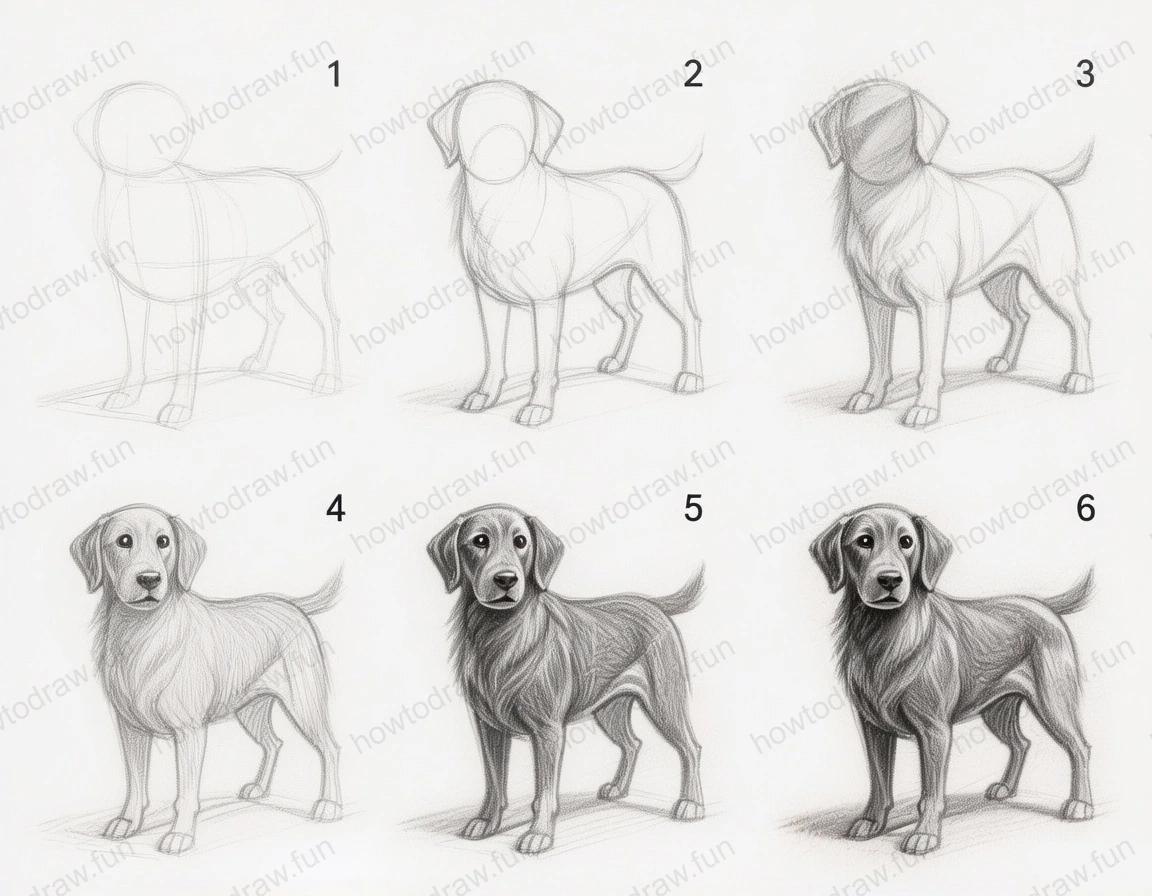
In the first step, begin by sketching the basic shapes that form the dog's body. Start with a circular shape for the head, and then draw an oval beneath it for the body. Use light pencil strokes to outline these forms, ensuring you position the head slightly above the body. Draw simple lines for the legs, keeping them in proportion to the body size. It’s essential to keep these initial lines light, as you’ll refine them later. Common mistakes include making the head too big or the legs too short, so pay close attention to proportions. This step sets the foundation for the rest of your drawing, so take your time to get it right.
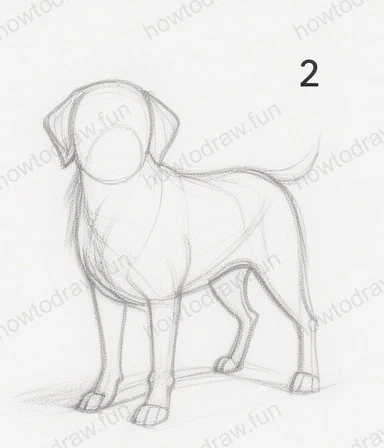
Step 2:
In this second step, refine the shapes you've drawn. Start to outline the facial features by adding the ears, which should be slightly floppy and attached to the sides of the head. Next, define the body’s outline, giving it a more realistic form by adding curves to the chest and belly. Ensure the legs are well-structured, with joints marked lightly. At this stage, you might want to add the tail, using a gentle curve to depict its shape. Remember to keep your lines smooth and flowing, avoiding any harsh angles. This step is crucial for establishing the dog's overall posture and expression.
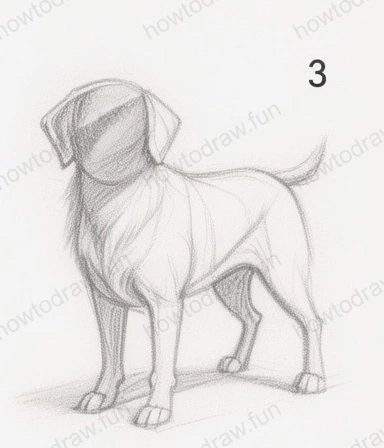
Step 3:
Now, it’s time to add more details to the dog's face and body. Begin sketching in the eyes, nose, and mouth. The eyes should be round and expressive, while the nose is typically larger and more pronounced. Add texture to the fur by sketching in light, short strokes around the head and body. Pay attention to the direction of the fur growth—this will add realism. Avoid pressing too hard with your pencil as you might want to erase and adjust parts later. This step requires patience as you start to see the dog taking shape.
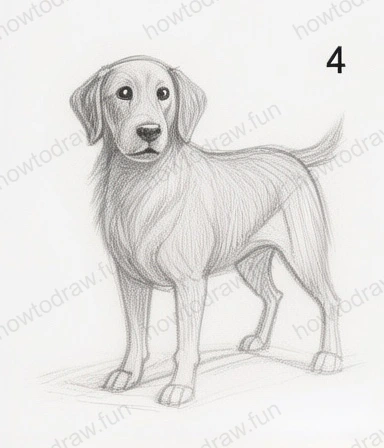
Step 4:
In this step, deepen the details of the dog's features. Focus on refining the fur texture by adding more strokes, varying the length and direction. Start shading in the areas around the face, especially under the chin and near the ears, to create depth. Use a softer pencil for darker areas, applying gentle pressure to achieve a rich tone. You can also define the legs further by adding shadows where the legs meet the body. Common mistakes include over-shading or making the fur too uniform, so ensure you maintain variety in your strokes.
Step 5:
Now, enhance the shading and add more definition to the dog's body. Work on the shadows beneath the dog to ground it in the space. Use a blending tool or your finger to soften harsh lines in the shadows. This will create a more realistic effect. Pay attention to the light source; it dictates where the shadows should fall. As you shade, remember to leave some areas lighter to simulate reflections in the fur. This step brings your drawing to a more lifelike appearance, so take your time.

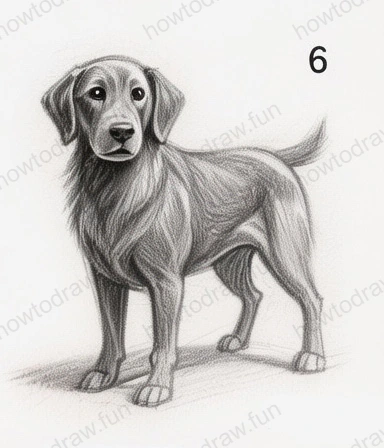
Step 6:
In the final step, review your drawing for any final touches. Add highlights in the eyes and on the fur to give it a polished look. Use an eraser to lift off some graphite in areas where light would naturally hit, creating a contrast that adds realism. Ensure the dog's expression is lively by adjusting the mouth and eyes slightly if necessary. This is where your dog should come to life! Take a moment to step back and assess your work; this reflection will help you identify areas for improvement.
In conclusion, you’ve learned how to draw a dog through a series of progressive steps that emphasized basic shapes, detailing, and shading. As you practice these techniques, try experimenting with different dog breeds or positions to enhance your skills. Remember, the more you draw, the better you’ll become. Keep practicing and don’t hesitate to incorporate your unique style into your drawings!
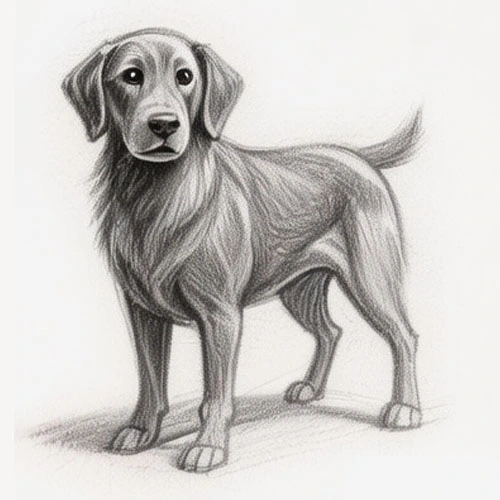
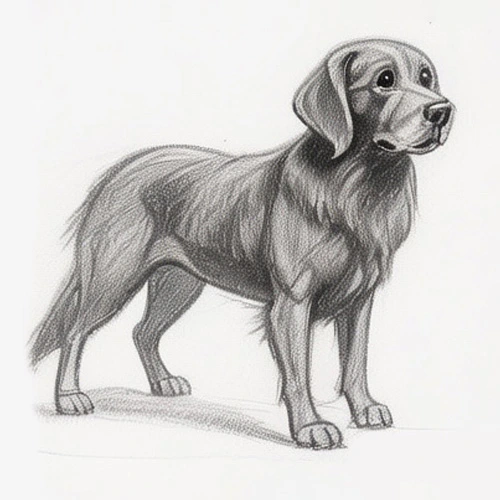
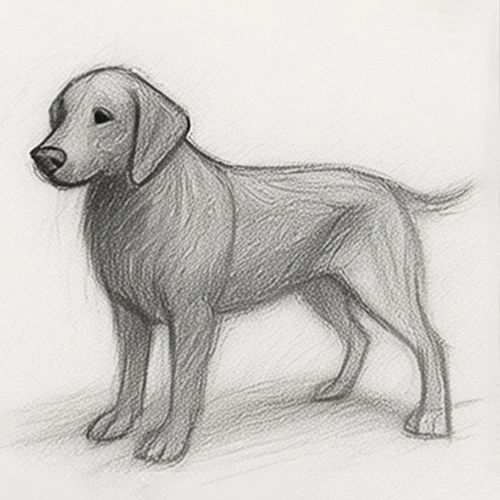
Reference Image
Here's the complete reference image:
More Intermediate Tutorials
How to Draw a Semi-Realistic Dog
Learn how to draw a realistic dog step-by-step, from basic shapes to detailed features and shading techniques.
How to Draw a Semi-Realistic Dog
Learn how to draw a dog step-by-step, from basic shapes to detailed features. Perfect for improving your sketching skills and capturing canine charm!
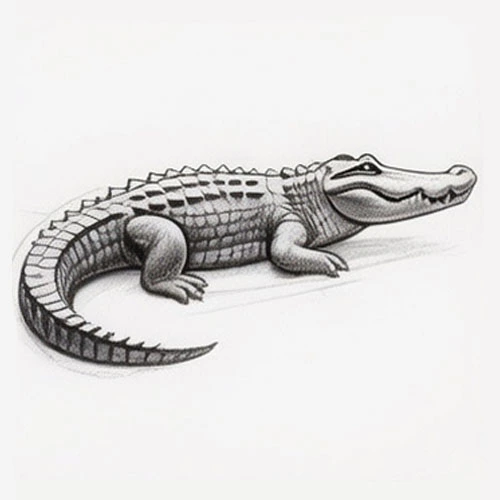
How to Draw a Semi-Detailed Crocodile
Learn how to draw a crocodile step-by-step, focusing on shapes, shading, and details to create a semi-realistic look.
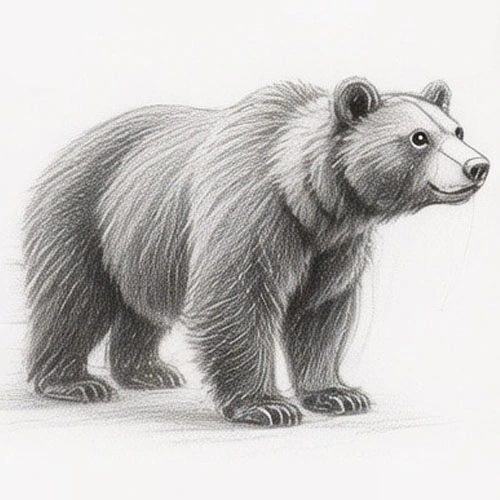
How to Draw a Semi-Realistic Bear
In this tutorial, you'll learn how to draw a semi-realistic bear through structured steps, focusing on shapes, proportions, and shading techniques.