How to Draw a Semi-Realistic Dog
Learn how to draw a realistic dog step-by-step, from basic shapes to detailed features and shading techniques.
How to Draw a Dog
In this tutorial, you will learn how to draw a realistic dog through a series of progressive steps. Starting from basic shapes, you will gradually add details, shading, and textures to create a lifelike representation of a dog. Follow along as we break down each step to make it easy and enjoyable!
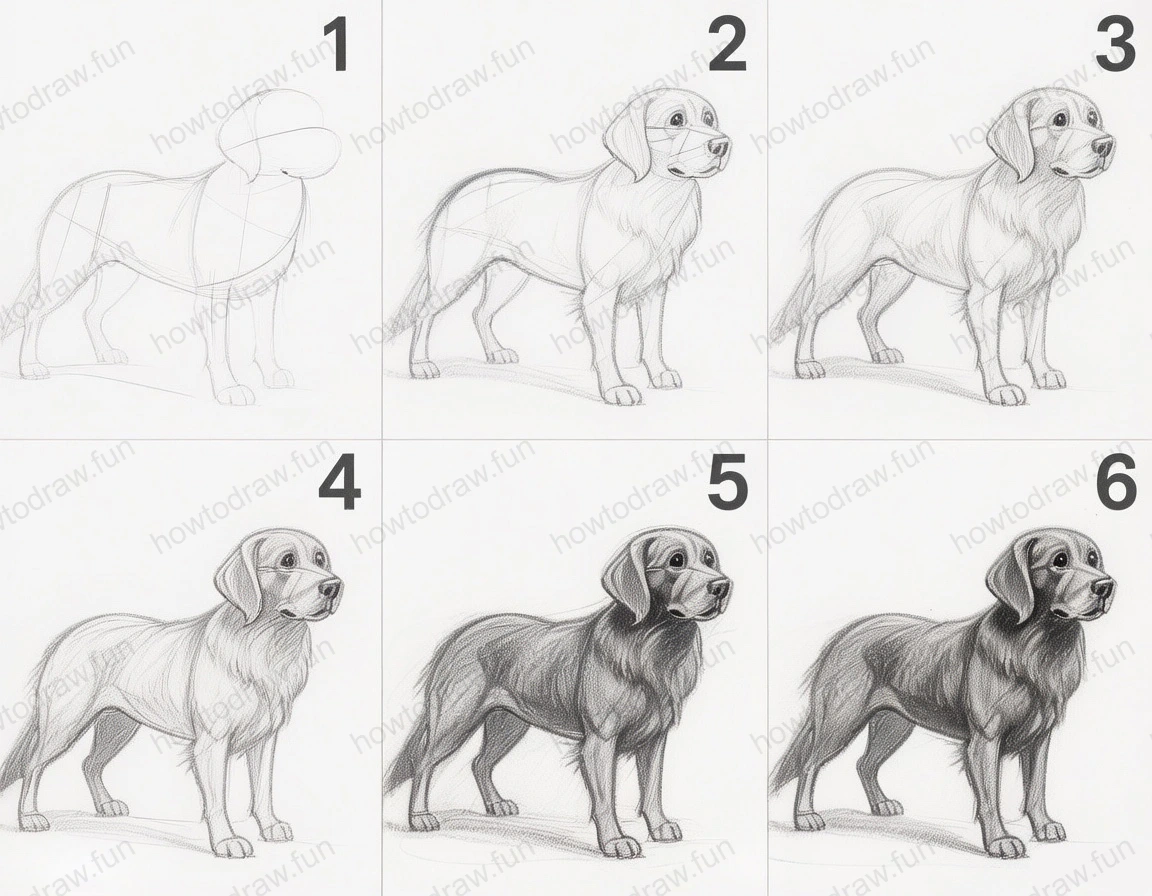
Step 1:
Begin by sketching the basic shapes that outline the dog's form. Start with a circle for the head and an oval for the body. Position the circle slightly above the oval to represent the head's placement. Add guidelines, such as a vertical line down the center of the head and a horizontal line to define the eyes' placement. For the legs, use straight lines extending downward from the body. This foundational shape helps you maintain proportions as you build upon it. Ensure your pencil strokes are light, allowing for easy adjustments. A common mistake at this stage is making the shapes too detailed; keep it simple and focus on the overall structure.
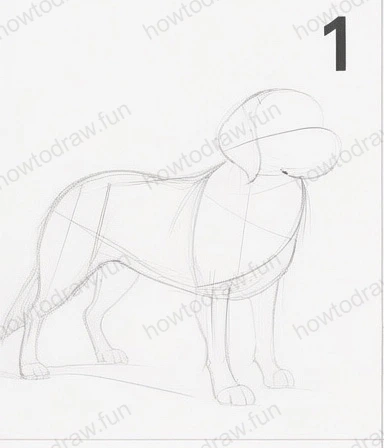
Step 2:
Now, refine the basic shapes into more defined outlines. Start shaping the head, adding curves for the ears and jawline. For the body, begin to define the chest and hindquarters by rounding the edges and ensuring a smooth flow between the shapes. Add guidelines for the legs, indicating the joints and paws. Take care to keep the proportions realistic, comparing the size of the head to the body. One common mistake is making the legs too short; ensure they are proportionate to the body. Use your eraser to remove any unnecessary lines while keeping the essential outlines visible.
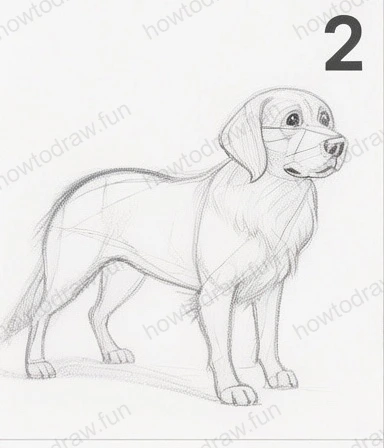
Step 3:
In this step, add more detail to the face and body. Focus on the eyes, nose, and mouth, giving them distinct shapes and expressions. Begin sketching the fur texture by using short, light strokes along the body and head. Pay attention to the direction of the fur as it follows the contours of the body. For the legs, add definition to the paws and joints. It's essential to keep your lines light, so you can easily adjust any features if needed. A frequent mistake is overworking details at this stage; remember to maintain balance and avoid overcrowding the drawing.
Step 4:
Start shading in this step to give your dog a more three-dimensional appearance. Use a soft pencil to add shadows, particularly under the belly, around the legs, and beneath the chin. Focus on the areas that would naturally be darker due to the light source. Blend your shading using a stump or your finger for softness. Be mindful of maintaining the texture of the fur while shading. A common pitfall is overdoing the shadows, which can make the drawing appear flat; aim for a balance that enhances depth without overwhelming the features.

Step 5:
Continue enhancing your drawing by adding more texture and details. Focus on the fur, using varied pencil pressures to create a sense of volume and flow. Darken areas where the fur overlaps or where shadows fall, adding contrast to make the drawing pop. Refine the eyes and nose, ensuring they have a shiny appearance by leaving small highlights. Pay attention to the overall balance of the drawing, making adjustments where necessary. Be careful not to rush through this step; take your time to ensure each detail contributes to a cohesive look.
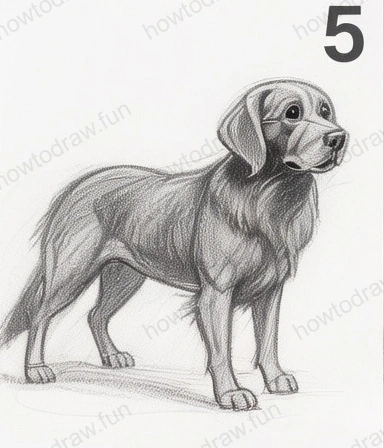
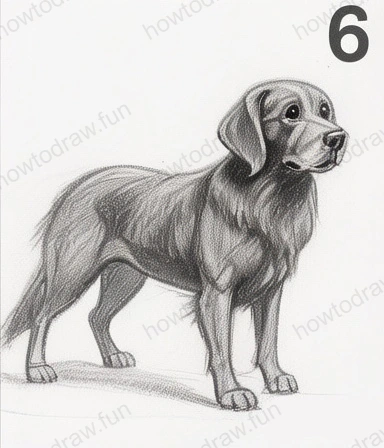
Step 6:
Finalizing your drawing involves going over your work and making any last adjustments. Use an eraser to highlight areas of fur, giving them a more dynamic look. Add final touches to the shading, ensuring all areas are well blended. Review the overall composition to ensure everything looks balanced and realistic. A common mistake is neglecting the background; consider adding a simple setting to give context to your drawing. Once satisfied, go over the outlines with a slightly darker pencil to enhance clarity, ensuring your piece is ready for display.
In conclusion, you have successfully learned how to draw a dog from basic shapes to a detailed, shaded piece. Each step focused on developing your skills in proportion, detail, and shading techniques, crucial for creating realistic drawings. Remember, practice is key! Try experimenting with different breeds or poses to expand your skills further. Don't hesitate to revisit any steps as needed, and keep pushing your creative boundaries. Happy drawing!
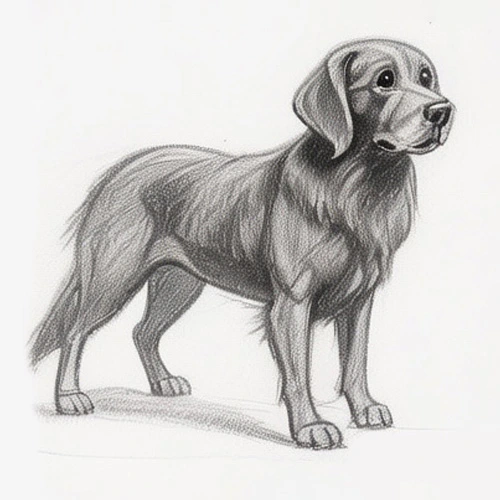
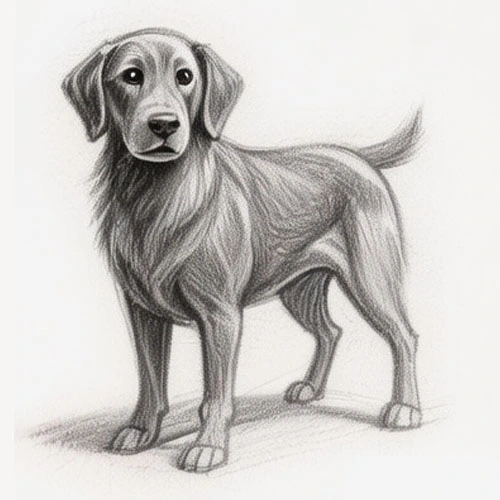
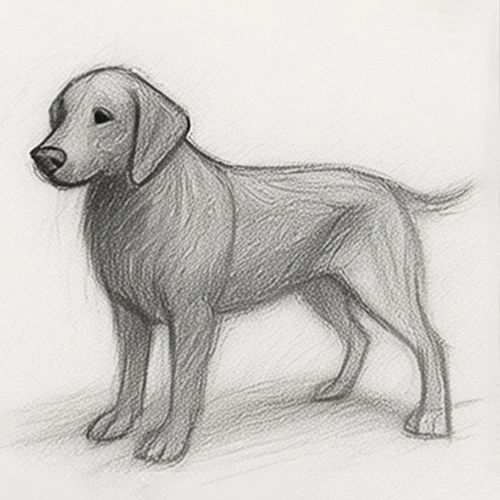
Reference Image
Here's the complete reference image:
More Intermediate Tutorials
How to Draw a Dog
Learn to draw a realistic dog step-by-step, focusing on shapes, shading, and texture. Perfect for improving your drawing skills!
How to Draw a Semi-Realistic Dog
Learn how to draw a dog step-by-step, from basic shapes to detailed features. Perfect for improving your sketching skills and capturing canine charm!
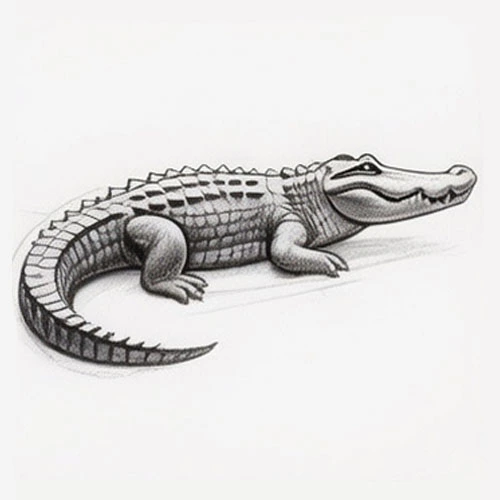
How to Draw a Semi-Detailed Crocodile
Learn how to draw a crocodile step-by-step, focusing on shapes, shading, and details to create a semi-realistic look.
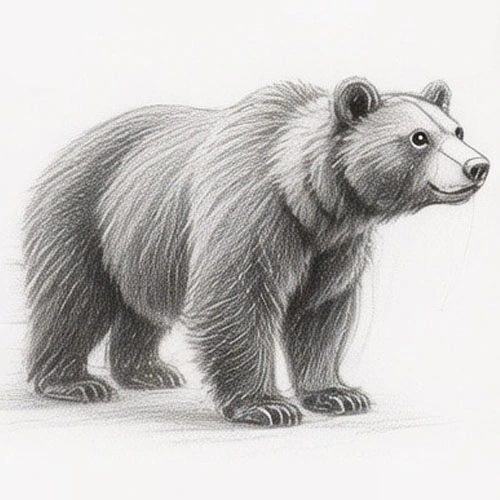
How to Draw a Semi-Realistic Bear
In this tutorial, you'll learn how to draw a semi-realistic bear through structured steps, focusing on shapes, proportions, and shading techniques.